 blog
Fine Sprayed Trim Finish: Pros, Cons & Best Paint
Table of Contents
- Spraying vs. Brushing Trim: What the Finish Actually Looks Like
- The Pros of a Fine Sprayed Trim Finish
- The Cons: Overspray, Masking, and Touch-Up Limits
- Prep Work for Spraying Trim: What Has to Happen First
- Airless vs HVLP Paint Sprayer for Trim
- The Best Paint Sheen for Interior Trim
- Cost, Durability, and When to Hire a Pro
- Frequently Asked Questions
Last Updated: October 2, 2026
Spraying vs. Brushing Trim: What the Finish Actually Looks Like
A fine sprayed trim finish is a method of applying paint to trim, baseboards, and millwork using a spray gun rather than a brush, producing a smooth, uniform surface with no brush marks. For homeowners weighing a fine sprayed trim finish, the pros and cons come down to three things: finish quality, labor, and how easily the trim can be repaired later.
The Pros of a Fine Sprayed Trim Finish
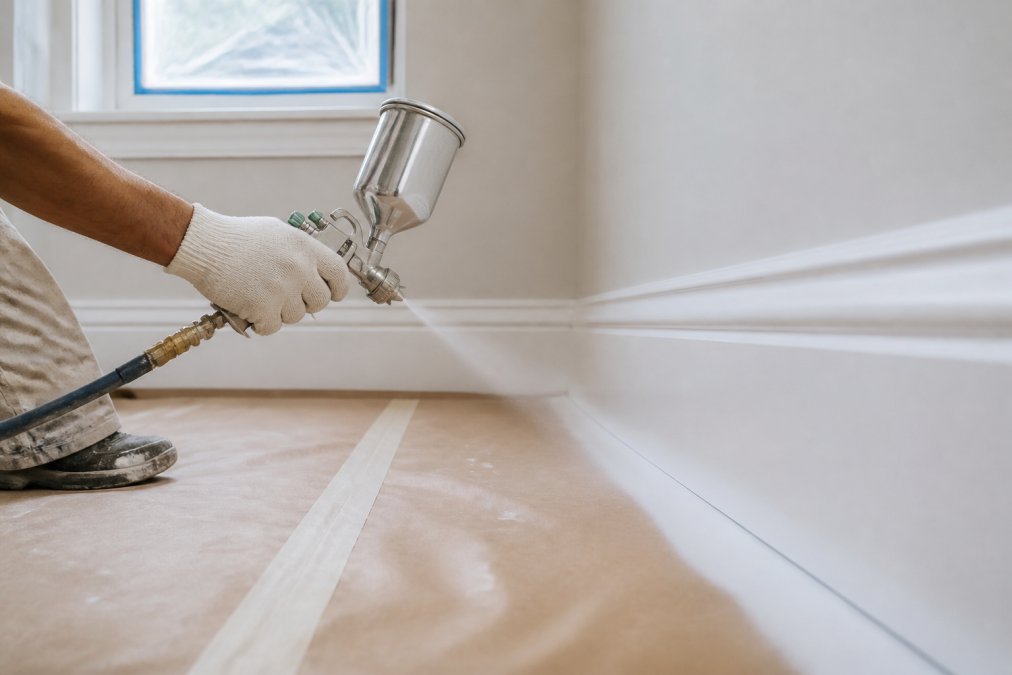
The main advantage of spraying trim is a level, glass-smooth surface that brushing simply cannot match. Paint lands in a uniform film across flat faces, edges, and profiles, so light reflects evenly instead of highlighting every stroke.
Uniform Coverage With No Brush Marks
Spraying eliminates brush marks and the slight texture they leave behind. On detailed trim profiles, the kind with curves and recesses, a brush struggles to reach every surface evenly. A spray gun coats those nooks and crannies in one pass. The result is uniform coverage and a consistent mil thickness across the whole run of trim.
Speed and Labor Savings on Large Trim Packages
On a single door casing, brushing is faster. On a whole house of baseboards, casings, and crown, spraying pulls ahead. A spray gun covers wide areas quickly, and the labor shifts from slow cutting-in to faster masking and prep. For large trim packages, that trade usually pays off. This is one reason whole-home painting projects often specify a sprayed finish.
The Cons: Overspray, Masking, and Touch-Up Limits
The biggest drawback of spraying trim is overspray. Atomized paint drifts onto floors, walls, windows, and furniture, so everything nearby needs protection before the gun comes out.
Aerosolized Paint, Masking Time, and Cleanup
Masking is the hidden cost of any sprayed finish. Floors, windows, cabinets, and adjacent walls all get taped and covered. That prep can take longer than the painting itself. Cleanup adds more time: the gun, cups, and lines all need to be flushed before paint cures inside them. With solvent-based coatings, that cleanup is slower and requires proper ventilation.
Repairability After the Finish Cures
A sprayed finish is harder to touch up than a brushed one. Once the coating cures, a spot repair rarely blends invisibly. A brush-applied touch-up will show a slight texture difference against the sprayed surface. On high-traffic trim that gets nicked, that mismatch is the trade-off you accept for the smoother original finish.
Prep Work for Spraying Trim: What Has to Happen First
Prep work for spraying trim decides whether the finish looks professional or patchy. Adhesion and smoothness both start before the gun is ever loaded.
The sequence matters:
- Fill nail holes and caulk gaps, then let everything dry fully
- Sand the trim smooth, then wipe it down with a tack cloth
- Apply a primer suited to the trim material and the topcoat
- Mask floors, windows, and adjacent surfaces completely
- Set spray pressure and test the pattern on scrap before starting
Airless vs HVLP Paint Sprayer for Trim
The two sprayers used for trim are airless and HVLP, and they suit different jobs. An airless sprayer pushes paint at high pressure and covers large areas fast, which makes it the choice for big trim packages and whole rooms. An HVLP sprayer uses lower pressure and less paint volume, giving finer control and less overspray, which suits detailed millwork and smaller jobs.
| Sprayer Type | Best For | Overspray | Control |
|---|---|---|---|
| Airless | Large trim packages, whole rooms | Higher | Moderate |
| HVLP | Detailed millwork, small jobs | Lower | Fine |
The Best Paint Sheen for Interior Trim
The best paint sheen for interior trim is satin or semi-gloss. Both resist scuffs and wipe clean easily, which matters on surfaces that get touched, kicked, and bumped. Semi-gloss reflects more light and shows imperfections in the substrate, while satin hides minor flaws and still cleans up well. On high-traffic baseboards and door casings, semi-gloss is the more forgiving choice for cleaning; on tall crown and paneled doors where glare is a concern, satin reads as a softer, more furniture-like finish.
- 100% acrylic waterborne enamels. These are the default for occupied homes. They dry fast, have low odor, clean up with water, and stay flexible so they resist cracking at joints as the trim expands and contracts. The trade-off is a shorter open time, which means lap marks and dry edges appear quickly if you overwork a section. They also tend to need a longer full cure before they reach their hardest film.
- Alkyd and oil-modified enamels. These level out beautifully and cure to a hard, block-resistant film that stands up to scrubbing. The cost is strong solvent odor, slower dry, and yellowing over time on whites and off-whites, especially in low-light rooms. They also demand solvent cleanup and more aggressive ventilation.
- Waterborne alkyd hybrids. These split the difference: the leveling and hardness of an alkyd with water cleanup and far less odor. They are the formulation most often recommended when someone wants a factory-like sprayed look without the solvent downsides.
| Coating | Typical fine-finish tip | Why |
|---|---|---|
| Waterborne acrylic enamel | Fine orifice, narrow fan | Thin viscosity needs a small orifice to avoid runs |
| Waterborne alkyd hybrid | Fine-to-medium orifice | Slightly thicker body needs more flow |
| Solvent alkyd/oil enamel | Medium orifice, wider fan | Higher viscosity needs more volume to atomize cleanly |
Cost, Durability, and When to Hire a Pro
- Masking and prep time scales with the room, not the trim. Floors, windows, doors, and adjacent walls all get covered whether you have 40 linear feet of baseboard or 400. That fixed cost is what makes spraying a losing proposition on small jobs.
- Spraying time scales with the trim. Once the room is masked, a spray gun covers linear feet far faster than a brush. The bigger the trim package, the more that speed advantage compounds.
- Brushing time scales with the trim and the profile. Flat baseboard brushes quickly. Crown, paneled doors, and detailed casings slow a brush down dramatically because every recess and curve has to be cut in by hand.
A few other cost factors are easy to overlook:
- Paint volume. Spraying wastes more coating to overspray and gun loss than brushing does, so budget slightly more paint per square foot.
- Equipment. A fine-finish HVLP or airless setup is a real capital cost if you do not already own one. For a one-time small job, that alone can push brushing ahead.
- Cleanup. Flushing a gun and lines adds time on every coat, and solvent-based coatings add more.
- Touch-up reserve. Keep a small amount of the same product and a brush on hand; sprayed trim will eventually get nicked, and a matched brush touch-up is the standard repair.
For homeowners who want the finish handled with precision, this is where a professional makes the difference. The Pampered Home specializes in quality sprayed coatings for lasting beauty, along with custom built-ins and finish carpentry. If you're weighing a sprayed finish against other options, the U.S. Environmental Protection Agency's guidance on indoor air quality during painting is worth a look before you choose a product.
Frequently Asked Questions
Is it better to spray or brush paint trim?
It depends on the trim package and the finish you want. Spraying lays down a uniform coat with no brush marks, which is why most high-end trim work uses a spray gun, and it is faster across long runs of casing, baseboard, and millwork. Brushing makes sense for small touch-up jobs, one or two doors, or occupied homes where masking every surface is not practical. Many crews spray the field and back-brush or hand-paint tight spots.
Does spraying trim require more prep work than brushing?
Yes, considerably more. Prep work for spraying trim includes sanding, filling nail holes, caulking gaps, priming bare wood, wiping with a tack cloth, and masking floors, walls, windows, and fixtures to contain overspray. Brushing needs only drop cloths and painter's tape at the edges. That masking and cleanup time is the main reason a sprayed trim finish costs more up front, even though the coating itself goes on faster.
What sheen do professional painters use on trim?
Satin and semi-gloss are the standard choices, with semi-gloss still the most common on traditional trim profiles because it wipes clean and reflects light along the edges. Satin has grown popular for a softer, less plastic look in modern interiors. Both hold up well on waterborne and solvent-based enamels. The deciding factor is usually how much scrubbing the trim will see, not the brand of paint.
What are the main downsides of a sprayed trim finish?
Overspray is the biggest one. Aerosolized paint drifts onto walls, floors, glass, and anything left in the room, so masking is non-negotiable. Sprayed trim is also harder to touch up later, since a brush repair will not match the sprayed texture exactly. Finally, the equipment, pressure settings, and viscosity control take skill, which is why a poor spray pattern shows up as runs, sagging, or dry spray.
Deciding between a sprayed and brushed finish comes down to your space, your timeline, and how much prep you're willing to manage. The Pampered Home brings quality sprayed coatings, expert design, and skilled craftsmanship to every project, with tailored solutions for trim, built-ins, and cabinetry. Get started with The Pampered Home and get a finish that holds its beauty for years.